24.05.29_TIL ( 팀 프로젝트 : AI NOST Django ) _ 5. Mybooklist CardDetailpage, 중간발표(dev 가져와서 실행), open AI
[ 세번째 프로젝트 ]
AI를 이용한 소설 사이트를 만들어 보자.
++ 팀 스로젝트로 팀과의 협업이 중요하다.
++ 장고 공식 문서는 항상 확인하기
https://docs.djangoproject.com/en/4.2/
++ 랭체인 공식 문서
https://www.langchain.com/
++ 리액트 공식문서
https://ko.legacy.reactjs.org/  # 한국어
https://ko.react.dev/
https://github.com/1489ehdghks/NOST.git
GitHub - 1489ehdghks/NOST
Contribute to 1489ehdghks/NOST development by creating an account on GitHub.
github.com
참고 사이트 : https://codepen.io/mo7amedk7alid29/pen/dRoMwo
Advanced TimeLine : HTML / CSS / JavaScript
...
codepen.io
참고 사이트 : https://codepen.io/magnus16/pen/vYERrO
Simple Comment Box using Bootstrap 3
...
codepen.io
1. 북 리스트에서 카드를 누르면 디테일 페이지로 넘어가게 패스 설정해주기
src/ app/ approuter.jsx 의 경로를 수정해준다.
import React from 'react';
import { Routes, Route, Navigate } from 'react-router-dom';
import HomePage from '../pages/home/HomePage';
import MainPage from '../pages/main/MainPage';
import useAuthStore from '../shared/store/AuthStore';
import Profile from '../pages/profile/Profile';
import Mybooklist from '../pages/mybooks/Mybooklist';
import CardDetail from '../widgets/card/CardDetail';
import SideLayout from '../widgets/layout/sideLayout/SideLayout';

const AppRouter = () => {
    const { isLoggedIn } = useAuthStore();

    const ProfileWithLayout = () => (
        <SideLayout>
            <Profile />
        </SideLayout>
    );

    const MybooklistWithLayout = () => (
        <SideLayout>
            <Mybooklist/>
        </SideLayout>
    );

    const MybooklistWithCardDetai = () => (
        <SideLayout>
            <CardDetail/>
        </SideLayout>
    );

    return (
        <Routes>
            <Route path="/" element={isLoggedIn ? <MainPage /> : <HomePage />} />
            <Route path="/main" element={<MainPage />} />
            <Route path="/profile" element={<ProfileWithLayout />} />
            <Route path="/Mybooklist" element={<MybooklistWithLayout />} />
            <Route path="/card/:id" element={<MybooklistWithCardDetai />} />
            <Route path="*" element={<Navigate to="/" />} />
        </Routes>
    );
};

export default AppRouter;
src/ pages/ mybooks/ Mybooklist.jsx 에도 카드 각각의 아이디와 클릭했을때의 경로를 설정해준다.
import React, { useState } from 'react';
import { useNavigate } from 'react-router-dom';
import useThemeStore from '../../shared/store/Themestore';
import './Mybooklist.scss';
const Card = ({ id, image, header, content, onClick }) => {
return (
<div className="card" style={{ backgroundImage: `url(${image})` }} onClick={() => onClick(id)}>
<div className="card-header"><h1>{header}</h1></div>
<div className="card-content"><p>{content}</p></div>
</div>
);
};
const Mybooklist = () => {
const { themes, currentSeason } = useThemeStore();
const currentTheme = themes[currentSeason];
const cards = [
{
id: 1,
image: 'https://images.unsplash.com/photo-1479660656269-197ebb83b540?dpr=2&auto=compress,format&fit=crop&w=1199&h=798&q=80&cs=tinysrgb&crop=',
header: 'Canyons',
content: 'Lorem ipsum dolor sit amet, consectetur adipisicing elit.'
},
{
id: 2,
image: 'https://images.unsplash.com/photo-1479659929431-4342107adfc1?dpr=2&auto=compress,format&fit=crop&w=1199&h=799&q=80&cs=tinysrgb&crop=',
header: 'Beaches',
content: 'Lorem ipsum dolor sit amet, consectetur adipisicing elit.'
},
{
id: 3,
image: 'https://images.unsplash.com/photo-1479644025832-60dabb8be2a1?dpr=2&auto=compress,format&fit=crop&w=1199&h=799&q=80&cs=tinysrgb&crop=',
header: 'Trees',
content: 'Lorem ipsum dolor sit amet, consectetur adipisicing elit.'
},
{
id: 4,
image: 'https://images.unsplash.com/photo-1479621051492-5a6f9bd9e51a?dpr=2&auto=compress,format&fit=crop&w=1199&h=811&q=80&cs=tinysrgb&crop=',
header: 'Lakes',
content: 'Lorem ipsum dolor sit amet, consectetur adipisicing elit.'
}
];
const [currentPage, setCurrentPage] = useState(1);
const cardsPerPage = 4;
const navigate = useNavigate();
const indexOfLastCard = currentPage * cardsPerPage;
const indexOfFirstCard = indexOfLastCard - cardsPerPage;
const currentCards = cards.slice(indexOfFirstCard, indexOfLastCard);
const totalPages = Math.ceil(cards.length / cardsPerPage);
const handleClick = (number) => {
setCurrentPage(number);
};
const generatePagination = () => {
const pages = [];
const maxPagesToShow = 5;
const halfPagesToShow = Math.floor(maxPagesToShow / 2);
let startPage = Math.max(currentPage - halfPagesToShow, 1);
let endPage = Math.min(startPage + maxPagesToShow - 1, totalPages);
if (endPage - startPage < maxPagesToShow - 1) {
startPage = Math.max(endPage - maxPagesToShow + 1, 1);
}
for (let i = startPage; i <= endPage; i++) {
pages.push(i);
}
return pages;
};
const handleCardClick = (id) => {
navigate(`/card/${id}`);
};
return (
<div className="container" style={{ color: currentTheme.textColor }}>
<h1 className="title">My Book List</h1>
<div className="cardlist">
{currentCards.map((card) => (
<Card
key={card.id}
id={card.id}
image={card.image}
header={card.header}
content={card.content}
onClick={handleCardClick}
/>
))}
</div>
<div className="pagination">
<button onClick={() => handleClick(1)} disabled={currentPage === 1}> « </button>
<button onClick={() => handleClick(currentPage - 1)} disabled={currentPage === 1}> < </button>
{generatePagination().map((page, index) => (
<button
key={index}
onClick={() => handleClick(page)}
className={currentPage === page ? 'active' : ''}>
{page}
</button>
))}
<button onClick={() => handleClick(currentPage + 1)} disabled={currentPage === totalPages}> > </button>
<button onClick={() => handleClick(totalPages)} disabled={currentPage === totalPages}> » </button>
</div>
</div>
);
};
export default Mybooklist;
src/ widgets/ card/ carddetail.jsx 를 생성해준다.
import React from 'react';
import { useParams } from 'react-router-dom';
import useThemeStore from '../../shared/store/Themestore';
import './CardDetail.scss';

const CardDetail = () => {
  const { id } = useParams();
  const { themes, currentSeason } = useThemeStore();
  const currentTheme = themes[currentSeason];

  // 예시 데이터
  const cardData = {
    1: {
      image: 'https://images.unsplash.com/photo-1479660656269-197ebb83b540?dpr=2&auto=compress,format&fit=crop&w=1199&h=798&q=80&cs=tinysrgb&crop=',
      header: 'Canyons',
      content: 'Lorem ipsum dolor sit amet, consectetur adipisicing elit. Reiciendis, eaque.',
      comments: [
        { user: 'User1', text: 'This is a comment about Canyons.', date: 'March 5th, 2014' },
        { user: 'User2', text: 'Amazing view!', date: 'March 6th, 2014' }
      ]
    },
    2: {
      image: 'https://images.unsplash.com/photo-1479659929431-4342107adfc1?dpr=2&auto=compress,format&fit=crop&w=1199&h=799&q=80&cs=tinysrgb&crop=',
      header: 'Beaches',
      content: 'Lorem ipsum dolor sit amet, consectetur adipisicing elit. Reiciendis, eaque.',
      comments: [
        { user: 'User3', text: 'Beaches are my favorite!', date: 'March 7th, 2014' },
        { user: 'User4', text: 'Beautiful!', date: 'March 8th, 2014' }
      ]
    },
    3: {
      image: 'https://images.unsplash.com/photo-1479644025832-60dabb8be2a1?dpr=2&auto=compress,format&fit=crop&w=1199&h=799&q=80&cs=tinysrgb&crop=',
      header: 'Trees',
      content: 'Lorem ipsum dolor sit amet, consectetur adipisicing elit. Reiciendis, eaque.',
      comments: [
        { user: 'User5', text: 'I love trees!', date: 'March 9th, 2014' },
        { user: 'User6', text: 'So green!', date: 'March 10th, 2014' }
      ]
    },
    4: {
      image: 'https://images.unsplash.com/photo-1479621051492-5a6f9bd9e51a?dpr=2&auto=compress,format&fit=crop&w=1199&h=811&q=80&cs=tinysrgb&crop=',
      header: 'Lakes',
      content: 'Lorem ipsum dolor sit amet, consectetur adipisicing elit. Reiciendis, eaque.',
      comments: [
        { user: 'User7', text: 'Lakes are so peaceful.', date: 'March 11th, 2014' },
        { user: 'User8', text: 'I want to visit this lake.', date: 'March 12th, 2014' }
      ]
    }
  };

  const card = cardData[id];

  return (
    <div className="card-detail" style={{ color: currentTheme.textColor }}>
      <div className="summary">
        <h1>{card.header}</h1>
        <img src={card.image} alt={card.header} />
        <p>{card.content}</p>
      </div>
      <div className="comment-box">
        <h2>Comment Box</h2>
        <div className="comments">
          <p>Lorem Ipsum is simply dummy text of the printing and typesetting industry.</p>
          {card.comments.map((comment, index) => (
            <div className="comment" key={index}>
              <img src="https://via.placeholder.com/50" alt="User" />
              <p>{comment.text} <br /><small>on {comment.date}</small></p>
            </div>
          ))}
        </div>
        <textarea placeholder="Your comments"></textarea>
        <button>Add</button>
      </div>
    </div>
  );
};

export default CardDetail;
++ 나중에 백앤드와 연결할 때 각각 가져올 값들을 미리보여주고 있지만 나중에는 연결을 해주어야 한다.
연결하는건 또 나중에...ㅎㅎ 일단 화면부터 미리 만들어두기
2. 카드 디테일 페이지에서 내용과 댓글창 보이게 만들기
src/ widgets/ card/ carddetail.scss 를 생성해준다.
.card-detail {
  display: flex;
  justify-content: space-between;
  padding: 20px;
}

.summary {
  flex: 1;
  margin-right: 20px;
  padding: 20px;
  background-color: #ffcccc; // example color
  border-radius: 10px;
}

.summary h1 {
  margin-bottom: 10px;
}

.summary img {
  max-width: 100%;
  border-radius: 10px;
  margin-bottom: 10px;
}

.summary p {
  font-size: 16px;
  line-height: 1.5;
}

.comment-box {
  flex: 1;
  padding: 20px;
  background-color: #fff;
  border-radius: 10px;
  box-shadow: 0 0 10px rgba(0, 0, 0, 0.1);
}

.comment-box h2 {
  margin-bottom: 10px;
}

.comments {
  margin-bottom: 20px;
}

.comment {
  display: flex;
  align-items: flex-start;
  margin-bottom: 10px;
}

.comment img {
  width: 50px;
  height: 50px;
  border-radius: 50%;
  margin-right: 10px;
}

.comment p {
  font-size: 14px;
  line-height: 1.4;
}

textarea {
  width: 100%;
  height: 80px;
  padding: 10px;
  margin-bottom: 10px;
  border-radius: 5px;
  border: 1px solid #ccc;
}

button {
  padding: 10px 20px;
  background-color: #007bff;
  color: #fff;
  border: none;
  border-radius: 5px;
  cursor: pointer;
}

button:hover {
  background-color: #0056b3;
}
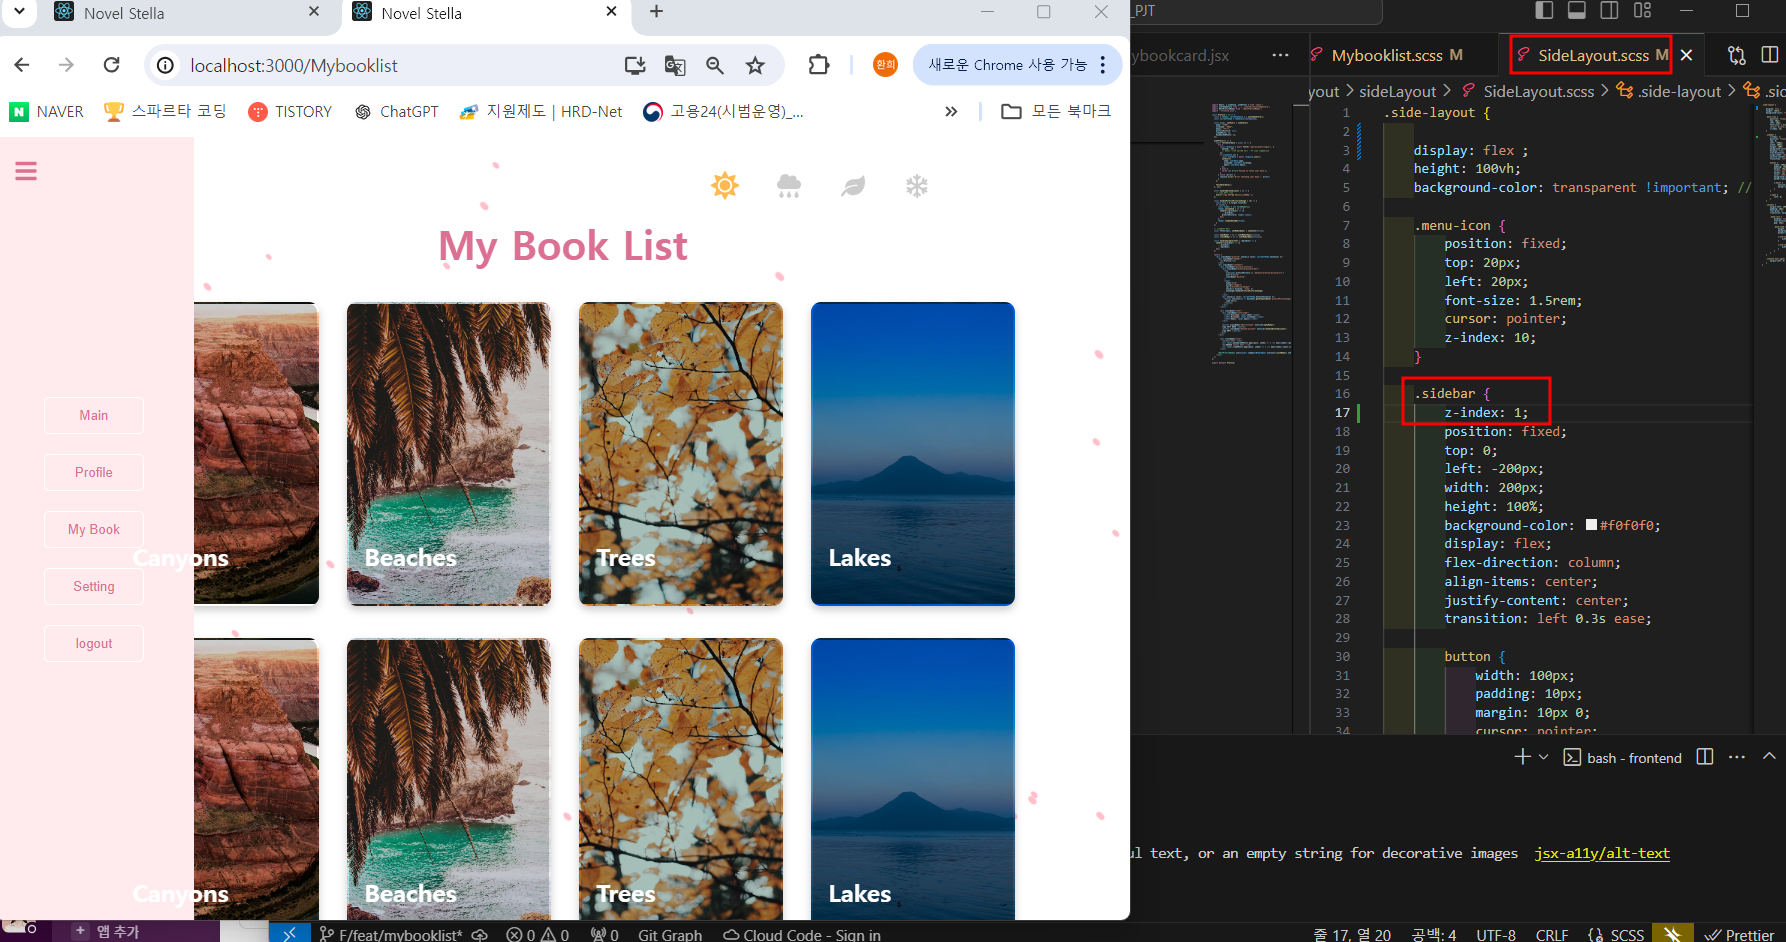
이렇게 화면이 나오는데 수정을 해야한다.
++ 사이드바가 자꾸 뒤로 넘어가서 사이드바를 z-index 로 조절해서 위로 올려주었다.
3. 카드 디테일 만들기
src/ widgets/ card/ carddetail.jsx 수정해주기
아직 그림은 넣을지 말지 결정하지 않아서 일단 보류, 프로필 사진도 넣을지 말지 일단 칸만 만들어 놓았다...ㅎ
import React from 'react';
import { useParams } from 'react-router-dom';
import useThemeStore from '../../shared/store/Themestore';
import './CardDetail.scss';

const CardDetail = () => {
  const { id } = useParams();
  const { themes, currentSeason } = useThemeStore();
  const currentTheme = themes[currentSeason];

  // 예시 데이터
  const cardData = {
    ...

    2: {
      image: 'https://images.unsplash.com/photo-1479659929431-4342107adfc1?dpr=2&auto=compress,format&fit=crop&w=1199&h=799&q=80&cs=tinysrgb&crop=',
      header: 'Beaches',
      content: 'Lorem ipsum dolor sit amet, consectetur adipisicing elit. Reiciendis, eaque.',
      comments: [
        { user: 'User3', text: 'Beaches are my favorite!', date: 'March 7th, 2014' },
        { user: 'User4', text: 'Beautiful!', date: 'March 8th, 2014' }
      ]
    },

    ...
  };

  const card = cardData[id];

  return (
    <div className="card-detail" style={{ color: currentTheme.textColor }}>
      <div className="summary">
        <h1>{card.header}</h1>
        {/* <img src={card.image}/> */}
        <p>{card.content}</p>
      </div>
      <div className="comment-box" >
        <h2>Comment Box</h2>
        <div className="comments">
          {card.comments.map((comment, index) => (
            <div className="comment" key={index}>
              <img src="https://via.placeholder.com/50" alt="User" />
              <p>{comment.text} <br />{comment.user} <small>on {comment.date}</small></p>
            </div>
          ))}
        </div>
        <textarea placeholder="Your comments"></textarea>
        <button style={{ backgroundColor: currentTheme.buttonBackgroundColor, color: currentTheme.buttonTextColor }}>Add</button>
      </div>
    </div>
  );
};

export default CardDetail;
src/ widgets/ card/ carddetail.scss 수정하기
.card-detail {
  display: flex;
  justify-content: space-between;
  padding: 20px;
  margin-top: 50px;
  height: 100%; // 화면 전체 높이 설정
  overflow: auto; //스크롤 활성화
  scrollbar-width: none; /* 스크롤바 안보임 */
}

.summary {
  flex: 1.5;
  margin-right: 20px;
  padding: 20px;
  background-color: #ffcccc; // example color
  border-radius: 10px;
  margin-bottom: 50px;
}

.summary h1 {
  margin-bottom: 10px;
}

.summary img {
  max-width: 100%;
  border-radius: 10px;
  margin-bottom: 10px;
}

.summary p {
  font-size: 16px;
  line-height: 1.5;
}


.comment-box {
  flex: 1;
  margin-left: 50px;
  margin-bottom: 50px;
}

.comment-box h2 {
  margin-bottom: 10px;
}

.comments {
  margin-bottom: 20px;
}

.comment {
  display: flex;
  align-items: flex-start;
  margin-bottom: 10px;
}

.comment img {
  width: 50px;
  height: 50px;
  border-radius: 50%;
  margin-right: 10px;
}

.comment p {
  font-size: 14px;
  line-height: 1.4;
}

textarea {
  width: 95%;
  height: auto;
  padding: 10px;
  margin-bottom: 10px;
  border-radius: 5px;
  border: 1px solid #ccc;
  resize: none; /* 사용자가 크기를 조절하지 못하도록 설정합니다. */
  scrollbar-width: none; /* 스크롤바 안보임 */
}

button {
  padding: 10px 20px;
  color: #fff;
  border: none;
  border-radius: 5px;
  cursor: pointer;
  margin-bottom: 150px;
  // margin-left: auto;
  // display: flex;

  &:hover {
    background-color: #eceaea !important;
  }
}

일단 이렇게 나오는데 summary 로 구분해서 나누는 것 하고, 코멘트도 조금 더 손볼 곳 있으면 손보는 것으로 해야한다.ㅠㅠ
아이구... 재미있는데 너무 어려워ㅜㅜ ㅋㅋㅋㅋ
-------------------------------------------------------------------------------------------------
4. 중간발표 (dev 가져와서 준비)
python 파일 실행할때.. 일단
.venv\Scripts\activate   //가상환경실행
pip install langchain    //랭체인 설치
pip list                 //설치된 pip 확인
pip install -r requirements.txt
python manage.py makemigrations
python manage.py migrate
python manage.py runserver
오픈 AI 키 가져와서 실행해보기
OpenAI의 API Key 발급 받고 테스트 하기
맥미니의 스크린샷 단축키가 어떻게 해서든 돌아오지 않아 슬픈 텍스트 가이드
velog.io