AI웹 개발자 과정 공부 (팀스파르타)/Django (장고)
24.05.01_TIL (Django 심화 : Json Response)
티아(tia)
2024. 5. 30. 16:47
728x90
++ 장고 공식 문서는 항상 확인하기
https://docs.djangoproject.com/en/4.2/
1. HTML Response 를 만들어보자.
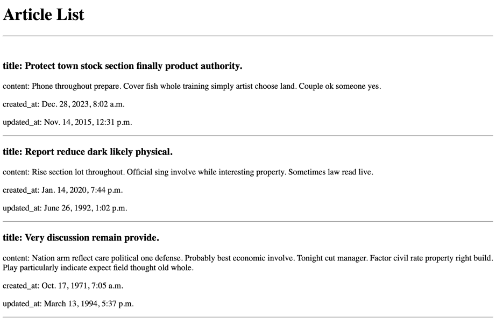
이렇게 보이는 화면을 만들고 싶다면?
- articles에서 urls.py 에 적어준다.
from django.urls import path
from . import views

app_name = "articles"
urlpatterns = [
    path("html/", views.article_list_html, name="article_list_html"),
]
- articles에서 views.py 에 적어준다.
from django.shortcuts import render
from .models import Article


def article_list_html(request):
    articles = Article.objects.all()
    context = {"articles": articles}
    return render(request, "articles/article_list.html", context)
- articles 에서 templates 에 articles 파일 안에 article_list.html 을 만들어주고 기본 세팅을 해준다.
<!DOCTYPE html>
<html lang="en">
<head>
    <meta charset="UTF-8">
    <meta name="viewport" content="width=device-width, initial-scale=1.0">
    <title>Document</title>
</head>
<body>

  <h2>Article List</h2>
  <hr><br>

  {% for article in articles %}
    <h3>title: {{ article.title }}</h2>
    <p>content: {{ article.content }}</p>
    <p>created_at: {{ article.created_at }}</p>
    <p>updated_at: {{ article.updated_at }}</p>
    <hr>
  {% endfor %}

</body>
</html>
python manage.py runserver
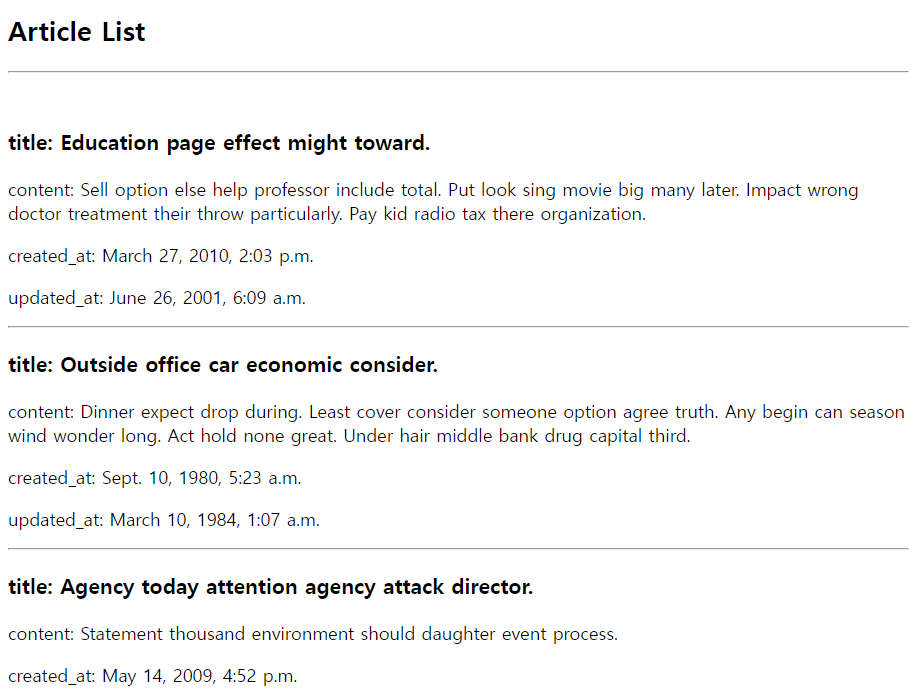
코드를 실행시킨 다음에 http://127.0.0.1:8000/api/v1/articles/html/ 로 들어가면 잘 보이는 것을 볼 수 있다.
2. Json Response 를 만들어보자.
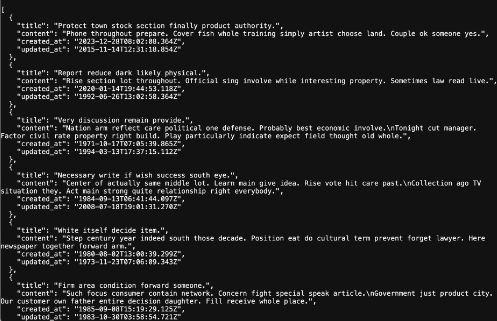
이렇게 백앤드 적인 부분만 확인해서 볼 수 있다. html 로 보지 않고도 Json으로 실행되는지 확인 할 수 있다.
- articles에서 urls.py 에 적어준다.
from django.urls import path
from . import views

app_name = "articles"
urlpatterns = [
    path("html/", views.article_list_html, name="article_list_html"),
    path("json-01/", views.json_01, name="json_01"),
]
- articles에서 views.py 에 적어준다.
from django.http import JsonResponse

...

def json_01(request):
    articles = Article.objects.all()
    json_res = []

    for article in articles:
        json_res.append(
            {
                "title": article.title,
                "content": article.content,
                "created_at": article.created_at,
                "updated_at": article.updated_at,
            }
        )

    return JsonResponse(json_res, safe=False)
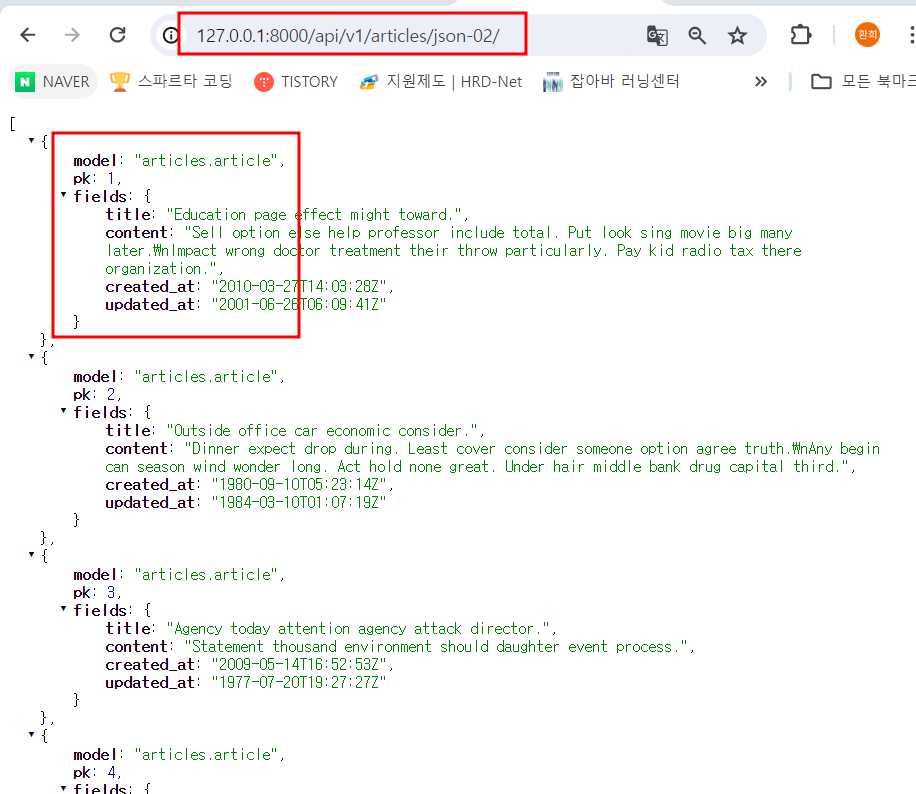
http://127.0.0.1:8000/api/v1/articles/json-01/ 로 실행하면 아래의 화면처럼 보이는 것을 확인할 수 있다.
📕 Serialization란?
직렬화(Serialization)
- 객체 또는 데이터 구조를 저장, 전송을 위해 다른 포맷으로 변경하는 것입니다.
- → 데이터의 구조는 유지하면서 추후 재구성이 가능한 포맷으로 변환해요!
- 현재 Python 객체 형태인 Queryset 혹은 Model의 Instance를 전송 가능한 형태로 직렬화를 통해 JSON, XML, YAML 등의 형태로 변환하는 것입니다.
- Django도 내부적으로 다른 데이터 포맷으로 쉽게 직렬화 할 수 있는 기능을 제공합니다.
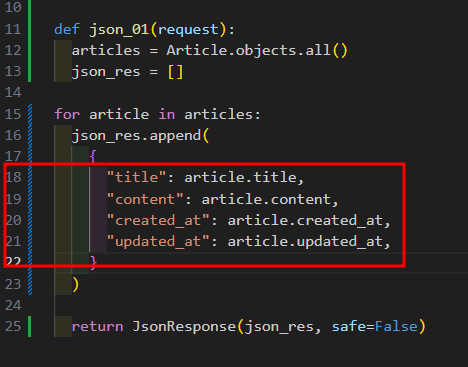
18번째줄에서 22번째줄 까지의 과정이 직렬화이다.
3. Json Response 의 다른 직렬화를 만들어보자.
- articles에서 urls.py 에 적어준다.
from django.urls import path
from . import views

app_name = "articles"
urlpatterns = [
    path("html/", views.article_list_html, name="article_list_html"),
    path("json-01/", views.json_01, name="json_01"),
    path("json-02/", views.json_02, name="json_02"),
]
- articles에서 views.py 에 적어준다.
from django.http import JsonResponse, HttpResponse
from django.core import serializers

...

def json_02(request):
    articles = Article.objects.all()
    res_data = serializers.serialize("json", articles)
    return HttpResponse(res_data, content_type="application/json")
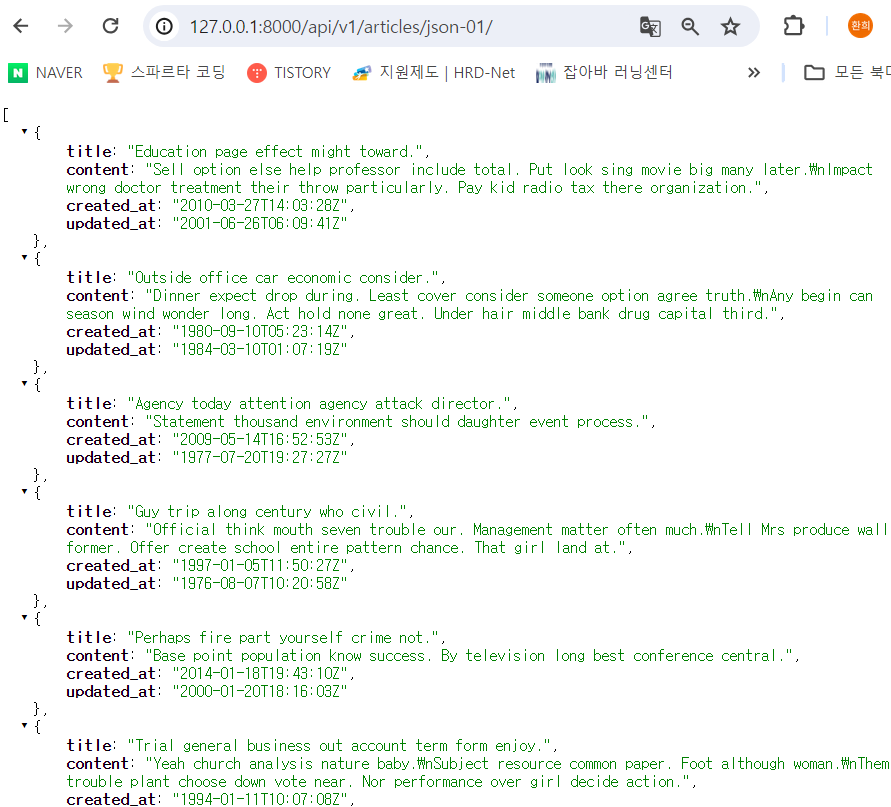
http://127.0.0.1:8000/api/v1/articles/json-02/ 로 들어가면 모델과 pk 등 포멧이 다르게 보이는 것을 알 수 있다.
✅ Django는 위와 같이 내부적으로 serializer를 제공하지만 모델 구조에 한정된 구조
- 직렬화된 데이터의 구조를 변경하거나 새로운 필드를 구성하는 것에 많은 추가 작업이 필요합니다.
- 유연한 API를 위한 기능이라기보다 모델 구조로 저장되어있는 데이터를 export 하는 용도에 가깝습니다.
⇒ 모델에 종속적이지 않고 유연하지만 사용하기 편한 Serializer의 필요성!
그래서 유연하게 하려면 Json-01 처럼 원하는 포멧을 가져올 수 있는 것이 필요하다.-> 그것이 DRF 이다. 편하게 쓸 수 있다.
반응형